

Upgrading your dash with aftermarket gauges can significantly enhance the driving experience of your VW Corrado. Not only do these gauges provide more accurate readings of crucial engine metrics, but they also add a touch of personalization to your interior. In this guide, we will walk you through the steps necessary to successfully install aftermarket gauges, ensuring that you maximize both performance and aesthetics.
Initially, it’s vital to choose the right gauges that complement your vehicle’s systems. Whether you are looking to monitor oil pressure, boost levels, or water temperature, selecting high-quality aftermarket options can make a notable difference. This article will delve into the various types of gauges available on the market, their specific functions, and how they integrate with your Corrado’s existing dashboard layout.
Once you have selected your desired gauges, the installation process can begin. We’ll provide you with detailed instructions to safely remove your dashboard and install the gauges with precision. This process not only involves technical know-how but also an awareness of your vehicle’s wiring systems. Follow along as we guide you step-by-step, ensuring a seamless transition from stock to aftermarket components for a truly customized driving experience.
Choosing the Right Aftermarket Gauges for Your Corrado
When it comes to upgrading your Corrado’s dash, selecting the appropriate aftermarket gauges is crucial for both performance and aesthetics. The first step is to identify which gauges you need. Popular options include boost gauges, oil pressure gauges, and water temperature gauges. Each of these plays a vital role in monitoring your vehicle’s health and performance.
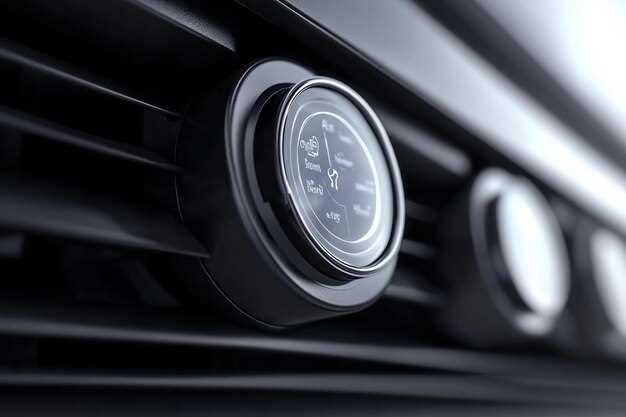
Next, consider the style of gauges that will complement your Corrado’s interior. Aftermarket gauges come in various designs, ranging from analog to digital displays. You should aim for a unified look that matches or enhances your existing dashboard layout.
Another important factor is accuracy. Choose gauges from reputable manufacturers known for their quality. Accuracy is vital for performance tuning as well as ensuring the reliability of your vehicle. Look for reviews and user feedback to gauge reliability before making your purchase.
Additionally, check for compatibility with your Corrado’s electrical system. Some aftermarket gauges may require specific sensors or wiring harnesses. Ensure the gauges you select come with all necessary components for installation.
Lastly, don’t overlook the price; while high-quality gauges can be an investment, there are budget-friendly options that still deliver decent performance. Set a realistic budget but remember that investing in reliable gauges can pay off in the long run through enhanced vehicle monitoring and tuning.
Tools and Materials Needed for Installation
Installing aftermarket gauges in your Corrado can enhance your driving experience by providing essential real-time data. To ensure a successful installation, you will need a variety of custom tools and materials tailored for this project.
First, gather a set of basic hand tools, including a socket set, screwdrivers, and pliers. These will help remove existing dash components and facilitate the installation of the new gauges. Additionally, a torque wrench is recommended for properly securing fasteners to prevent any loose connections.
You will also need wiring supplies. This includes automotive-grade wiring, connectors, and heat shrink tubing for a clean and durable finish. A crimping tool is essential for creating secure electrical connections between the gauge and the vehicle’s wiring harness.
For mounting the aftermarket gauges, you can consider a custom gauge pod or bracket designed specifically for the Corrado. Make sure to have appropriate adhesive or screws for securing the pod to the dash. If your installation requires a custom dash modification, a Dremel tool or cutting saw may be necessary for precise adjustments.
Don’t forget to have a multimeter on hand for testing electrical connections and ensuring proper functionality of your gauges. Finally, consider protective gear such as gloves and safety glasses to ensure your safety during the installation process.
Removing the Stock Dashboard for Gauge Access
To successfully install your custom aftermarket gauges in the Corrado, it is essential to start by removing the stock dashboard. This process allows access to the gauge cluster, ensuring that you can securely mount and connect your new gauges.
Begin by disconnecting the negative battery terminal to prevent any electrical issues during the removal process. Next, carefully remove any trim pieces surrounding the dash using a trim removal tool. This will help to protect the dashboard from scratches or damage.
Once the trim is off, locate the screws that secure the dashboard in place. These are generally found at the top and sides of the dash. Use a screwdriver to remove them, keeping them in a safe place for reassembly later.
With the screws out, gently pull the dashboard away from the mounting points. Take care to avoid forcing it, as this can break clips or fasteners. If you encounter resistance, double-check that all screws and clips have been removed.
As you detach the dashboard, be mindful of any wiring connections that may still be attached. You may need to disconnect these wires carefully to fully remove the dash. It’s a good idea to label each connector as you go, simplifying reinstallation later.
Once you have successfully removed the stock dashboard, you will have clear access to the gauge cluster. This step is crucial for the installation of your aftermarket gauges, allowing you to ensure proper placement and wiring before reassembling the dashboard.
Wiring and Connecting Aftermarket Gauges
When installing aftermarket gauges in your Corrado, proper wiring is crucial for ensuring functionality and accuracy. Here’s a detailed guide to help you navigate the process of wiring and connecting your custom dashboard gauges.
- Gather Necessary Tools and Materials
- Wire strippers and crimpers
- Soldering iron and solder
- Heat shrink tubing
- Electrical tape
- Gauge-specific wiring harness (if available)
- Multimeter for testing connections
- Plan Your Layout
Before any wiring takes place, plan where each gauge will be positioned on your dash. Consider visibility and accessibility, ensuring that all gauges are adequately spaced and easy to read.
- Identify Wires for Power and Ground
Most aftermarket gauges require a power source and a ground connection. Locate the ignition switch for a switched power source:
- Connect the power wire from the gauges to the ignition switch.
- Use a suitable gauge wire to ensure proper current flow.
For grounding, find a solid metal point on the chassis to attach the ground wire. Ensure all connections are secure to avoid voltage drops.
- Connect Signal Wires
Each gauge will have specific signal wire requirements:
- Temperature gauges typically require a sender unit. Install the sender in the engine block.
- Oil pressure gauges also use senders, which can be added to the oil filter housing.
- Tachometers usually connect to the ignition coil or ECU signal for engine RPM information.
- Test Connections
After wiring, it’s essential to test each connection:
- Use a multimeter to verify voltage on power wires.
- Check continuity on ground connections.
- Ensure proper function by turning on the ignition and observing gauge operation.
- Secure and Insulate Wiring
Once tested, secure all wires using zip ties to prevent movement. Insulate connections with electrical tape or heat shrink tubing to prevent shorts and corrosion.
By following these steps, you will successfully wire and connect your aftermarket gauges, enhancing your Corrado’s custom dashboard with functionality and style.
Calibrating Your New Gauges for Accurate Readings
After installing aftermarket gauges in your Corrado’s dash, the next crucial step is calibration. Proper calibration ensures that your new gauges provide accurate readings, enhancing the performance and reliability of your custom setup. Here’s how to effectively calibrate them.
First, understand the specifications of each gauge you installed. Different gauges may have varying calibration processes based on their type (analog or digital) and manufacturer. Refer to the user manual for specific guidance for your aftermarket gauges.
Here’s a general overview of the calibration process:
| Gauge Type | Calibration Steps |
|---|---|
| Analog Gauges | 1. Start the engine and let it reach operating temperature. 2. Use a manual gauge (like a mechanical oil pressure gauge) to compare readings. 3. Adjust the needle position using the calibration screw if necessary. |
| Digital Gauges | 1. Power on the car and the gauge. 2. Access the calibration mode (often through a button sequence). 3. Follow the onscreen instructions to calibrate each parameter based on known measurements. |
For accurate readings, it is essential to compare the aftermarket gauges against factory specifications or known values. This might involve cross-referencing with your vehicle’s original equipment or using reliable diagnostic tools.
After calibrating, take your Corrado for a test drive. Monitor the readings to ensure they align with your expectations based on the driving conditions. If discrepancies arise, a second calibration may be necessary.
In conclusion, calibrating your aftermarket gauges is a vital part of the installation process. Following a structured approach ensures that your custom setup operates effectively, allowing you to enjoy optimal performance from your vehicle.
Customizing the Dash for a Professional Finish

When installing aftermarket gauges in your Corrado, customizing the dash is essential for achieving a professional look. A well-executed dash modification not only enhances the visual appeal but also improves functionality and usability. Start by selecting gauges that complement your car’s interior theme, paying attention to color schemes and styles. Opting for a cohesive design ensures that the new gauges integrate seamlessly with the existing dashboard elements.
Next, consider the placement of the gauges. Choosing a location that is easily visible while driving is crucial. Popular spots include the A-pillar or center console. However, if you prefer a more bespoke approach, you can create custom housing for your gauges. This may involve using fiberglass or other materials to craft a unique setup that fits your vision while maintaining an organized appearance.
Once you’ve determined where the gauges will be positioned, prepare the dash surface by cleaning and, if necessary, sanding the area to remove any imperfections. This ensures proper adhesion for any adhesive materials or custom trim pieces you may apply. If you are integrating gauges into the existing dash, precision cutting is paramount. Use templates or careful measurements to create clean openings, avoiding jagged edges that can detract from the overall finish.
To achieve a polished appearance, employ high-quality finishes like vinyl wrapping or paint that matches the original dash color. Don’t forget to consider backlighting options for the gauges, as proper illumination can greatly affect visibility and aesthetics. LED lights are a popular choice as they provide vibrant illumination while consuming less power.
Finally, ensure that all wiring and connections are neatly organized and secured. A cluttered dash can detract from the professional finish you aim for. Use zip ties or wire loom for a tidy look. After everything is in place, take a step back and assess the overall appearance of your customized dash. With attention to detail and a focus on quality, your aftermarket gauges will not only be functional but also achieve a stunning, professional finish that enhances your Corrado’s interior.


