

Replacing the brake rotors on your Corrado is an essential maintenance task that can significantly enhance your vehicle’s safety and performance. As part of the braking system, disc rotors play a crucial role in converting kinetic energy into heat through friction. Over time, these rotors can wear out, resulting in decreased braking efficiency and potential safety hazards.
This guide will walk you through the step-by-step process of replacing your Corrado’s brake rotors. Whether you’re an experienced DIY enthusiast or a novice mechanic, understanding how to properly execute this replacement will save you time and money. We’ll cover the necessary tools, safety precautions, and detailed instructions to ensure a successful replacement of your brake rotors.
Before diving into the process, it’s important to familiarize yourself with the signs that indicate your brake rotors need attention. Symptoms such as vibration while braking, unusual noises, or visible wear and tear are all indicators that it’s time for a replacement. By addressing these issues promptly, you can maintain optimal braking performance and prolong the lifespan of your Corrado.
Tools and Materials Required for Brake Rotor Replacement
Replacing brake rotors on a Corrado requires specific tools and materials to ensure a successful and safe job. Below is a comprehensive list of what you will need to accomplish this task effectively.
Tools:
1. Jack and Jack Stands: A hydraulic floor jack is essential for lifting the car safely. Use jack stands to securely support the vehicle while you work.
2. Socket Set: A complete socket set with both metric and standard sizes is crucial for removing the bolts securing the brake calipers and rotors.
3. Torque Wrench: To ensure that all bolts are tightened to the manufacturer’s specifications, a torque wrench will help maintain safety and performance.
4. Brake Caliper Tool: This tool is useful for compressing the caliper piston back into its housing, allowing for easier reinstallation after rotor replacement.
5. Wire Brush: A wire brush is helpful for cleaning any rust or debris from the hub surface before installing the new rotors.
Materials:
1. New Brake Rotors: Choose high-quality disc rotors that meet OEM specifications to ensure proper performance and longevity.
2. Brake Pads: It is advisable to replace brake pads along with the rotors for optimal braking performance and to prevent uneven wear.
3. Brake Fluid: Having fresh brake fluid on hand is essential for bleeding the brakes after the installation process.
4. Anti-Seize Compound: Applying anti-seize on the hub surface before installation of the new rotors can help prevent rust and facilitate easier future removal.
5. Brake Cleaner: This is necessary for cleaning new rotors to eliminate any protective coating that can hinder braking performance.
Gather these tools and materials before starting the brake rotor replacement, ensuring a smoother and more efficient process.
Step-by-Step Process for Removing Old Brake Rotors

Removing old brake rotors is essential during the replacement process to ensure optimal braking performance. Follow these detailed steps to correctly remove the brake rotors from your Corrado.
| Step | Description |
|---|---|
| 1 | Start by securing your vehicle on a flat surface. Engage the parking brake and, if necessary, use wheel chocks to prevent rolling. |
| 2 | Loosen the lug nuts on the wheel covering the brake rotor. Do not remove them completely yet; just break their initial resistance. |
| 3 | Raise the vehicle using a jack, ensuring it is secure on jack stands before proceeding. |
| 4 | Fully remove the loosened lug nuts and take off the wheel to expose the brake rotor. |
| 5 | Inspect the brake caliper. Use a socket wrench to remove the caliper mounting bolts. Remember to support the caliper using a hanger or similar support to avoid stress on the brake line. |
| 6 | With the caliper removed, carefully take out the old brake pads from the caliper bracket. |
| 7 | Now, locate the rotor retaining screws, if equipped. Remove these screws using a suitable screwdriver or socket to release the rotor. |
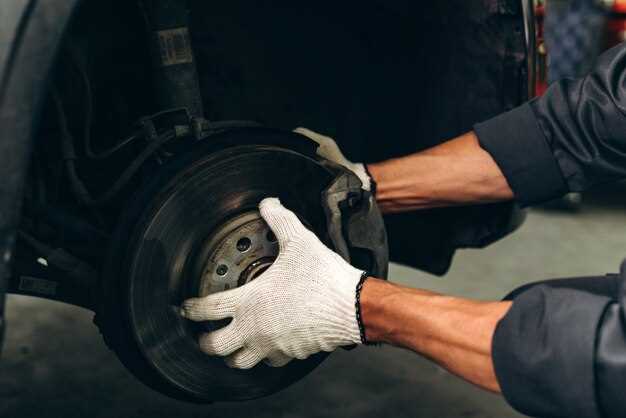
| 8 | Gently wiggle and pull the rotor away from the wheel hub. If the rotor is stuck due to rust or corrosion, use a rubber mallet to tap around the edges until it loosens. |
| 9 | Inspect the rotor hub for any debris or rust. Clean the hub surface thoroughly to ensure proper installation of the new disc rotor. |
Following these steps will allow you to successfully remove the old brake rotors from your Corrado, preparing you for the installation of new replacement components.
How to Install New Brake Rotors Correctly
Replacing the brake rotors on your Corrado involves a series of precise steps to ensure optimal performance and safety. Start by safely lifting the vehicle using jack stands, making sure it’s stable before proceeding. Remove the wheel to access the braking components.
Next, detach the caliper by removing the bolts that hold it in place. Carefully slide the caliper off the old disc rotor; it’s advisable to support it using a wire hanger to prevent straining the brake line. Once the caliper is out of the way, you can remove the existing rotor. If it’s stuck, gently tapping it with a rubber mallet can help dislodge it.
Before installing the new disc rotors, perform a thorough inspection of the mounting surface on the wheel hub to ensure it is clean and free of rust or debris. This step is crucial, as any contaminants can cause uneven wear and affect braking performance. Once cleaned, mount the new rotor onto the hub, aligning it with the bolt holes.
After placing the new rotors, reinstall the caliper over the rotor. Ensure that it is aligned correctly and tighten the caliper bolts to the manufacturer’s specified torque settings. It’s essential to follow the torque specifications to avoid future issues with brake performance.
Finally, reattach the wheel and lower the vehicle back to the ground. Before driving, pump the brake pedal a few times to seat the brake pads against the new rotors properly. This process helps in establishing a firm brake feel and ensures effective braking when you hit the road.
Tips for Proper Brake Pad Alignment with New Rotors
When replacing the brake rotors on your Corrado, ensuring proper brake pad alignment is crucial for optimal braking performance and longevity. Here are some essential tips to achieve accurate alignment:
- Clean the Components: Before installing the new rotors, clean the brake caliper and brake pad surfaces. Remove any dust, grease, or debris that may interfere with the alignment.
- Inspect the Caliper: Ensure that the brake caliper is in good condition. Examine for any signs of wear or damage that could affect the alignment of the brake pads against the rotors.
- Check Brake Pad Thickness: Verify that the new brake pads are of uniform thickness. Uneven thickness can lead to improper contact with the rotors, affecting braking efficiency.
- Use Quality Rotors: Select high-quality disc rotors that are manufactured to precise specifications. Poorly made rotors can result in poor alignment and uneven wear on the brake pads.
- Align with the Caliper: When installing the pads, ensure they are properly seated within the caliper bracket. The pads should be evenly spaced on both sides of the rotor.
- Check Pad Orientation: Install the brake pads according to the manufacturer’s instructions. Misalignment can occur if the pads are reversed or improperly oriented.
- Torque Specifications: When securing the caliper, follow the recommended torque specifications. Over-tightening can cause misalignment or damage the components.
- Test Braking Performance: After installation, take the vehicle for a short drive to test the brakes. Listen for any unusual noises and feel for uneven braking, which might indicate alignment issues.
By following these tips, you can ensure proper brake pad alignment with your new rotors, which is essential for safe and efficient braking.
Common Mistakes to Avoid During Rotor Replacement
Replacing brake rotors is a critical maintenance task for your Corrado, but it’s easy to make mistakes that can compromise safety and performance. Here are some common errors to avoid during rotor replacement.
1. Skipping the Maintenance of Brake Components
Neglecting to inspect other brake components, such as pads and calipers, can lead to uneven wear and reduced performance. Always check these components for damage or excessive wear before proceeding with rotor replacement.
2. Using Incorrect Tools
Using the wrong tools can damage the brake components or lead to improper installation. Ensure that you have all necessary tools, including a torque wrench, to securely fasten the rotor and ensure proper alignment.
3. Not Cleaning the Hub Surface
Failure to clean the hub surface before installing new rotors can cause rust buildup and uneven wear. Make sure to thoroughly clean the hub to ensure a smooth fit for the new disc.
4. Over-Tightening the Fasteners
Over-tightening the wheel lugs or rotor fasteners can lead to warping or damage to the components. Always follow the manufacturer’s torque specifications to avoid this mistake.
5. Ignoring Brake Bed-In Procedures
After replacing rotors, it’s essential to properly bed in the new brake pads. Skipping this step can result in poor braking performance and premature wear, as the pads need to conform to the new disc surface.
6. Using Old Hardware
Reusing old bolts or clips may save time, but it can lead to failure. Always replace hardware with new, high-quality parts to ensure reliability and performance.
Conclusion
Being aware of these common mistakes can help you achieve a successful brake rotor replacement on your Corrado. Take your time, follow procedures, and always prioritize safety to ensure optimal braking performance.
Post-Replacement Maintenance for Brake Performance
After completing the replacement of your brake rotors, it is essential to perform maintenance to ensure optimal brake performance. Proper care can significantly extend the lifespan of your new components and enhance safety during driving.
First, allow your new brake rotors to bed in properly. This process involves gradually applying the brakes during your initial drives to create an even layer of brake pad material on the rotor surface. Aim for a series of gradual stops from moderate speeds, gradually increasing the intensity. Avoid abrupt stops, as this can lead to uneven wear and reduced braking effectiveness.
Regularly check the brake fluid level and condition. Maintaining the right fluid level is crucial for effective brake operation. If the fluid appears dark or contaminated, consider flushing the system and replacing it with fresh fluid. This ensures that the hydraulics work smoothly and respond effectively when engaging the brakes.
Inspect the brake pads for wear periodically. Ensure that they are adequately aligned and not overly worn. Replacing them alongside the brake rotors at the same time is advisable to maintain balanced braking power. Additionally, keep an eye out for any unusual noises or vibrations, as these can indicate issues with the rotor or pad arrangement.
Lastly, maintain your vehicle’s suspension and alignment. Proper suspension ensures that the brake rotors wear evenly, which promotes consistent brake performance. If you notice any handling issues, such as pulling to one side or uneven tire wear, proactivity in addressing these concerns can improve overall driving safety.


