Upgrading your vehicle’s braking system is essential for both performance and safety. One of the most effective modifications you can make is to replace your standard brake lines with high-quality stainless steel brake lines. These lines offer increased durability, improved responsiveness, and enhanced safety, making them an ideal choice for any automotive enthusiast looking to elevate their driving experience.
The process of installing stainless steel brake lines may seem daunting, but with the right tools and guidance, it can be a straightforward task. This guide will walk you through the necessary steps to ensure a successful installation, allowing you to enjoy the benefits of your upgrade without hassle. From gathering materials to properly securing the connections, we will cover every aspect of the installation process, ensuring that your brake system functions optimally.
In addition to the technical details, we will also discuss the advantages of stainless steel brake lines over traditional rubber ones. By understanding the benefits, you can make an informed decision that enhances your vehicle’s performance and safety on the road. Whether you are a seasoned mechanic or a DIY enthusiast, this guide will provide you with valuable insights to achieve a successful upgrade.
Choosing the Right Stainless Steel Brake Lines for Your Vehicle

When considering an upgrade to your vehicle’s braking system, selecting the right stainless steel brake lines is crucial for enhancing performance and safety. Stainless steel brake lines offer superior durability and resistance to corrosion compared to traditional rubber hoses, providing a more reliable and consistent brake feel.
To ensure you choose the most suitable brake lines, consider the following factors:
| Factor | Details |
|---|---|
| Vehicle Compatibility | Check that the brake lines are designed specifically for your vehicle’s make and model to ensure proper fitment. |
| Length | Measure the distance from the brake caliper to the connection point; lines that are too short or too long can affect performance. |
| End Fittings | Inspect the type and size of end fittings. Ensure they match your vehicle’s brake system standards. |
| Pressure Rating | Choose brake lines with a pressure rating that exceeds your braking system’s requirements for optimal performance and safety. |
| Brand Reputation | Select products from reputable manufacturers known for quality and performance in brake line technology. |
Ultimately, upgrading to stainless steel brake lines is a valuable investment in your vehicle’s safety and handling. By considering compatibility, dimensions, and quality, you will ensure that your brake system performs effectively under various conditions.
Tools and Materials Needed for Installation
Installing stainless steel brake lines requires specific tools and materials to ensure a successful and safe installation process. Below is a comprehensive list of what you will need:
- Stainless Steel Brake Lines: Ensure you have the right diameter and length for your vehicle model.
- Brake Fluid: Use the recommended type of brake fluid for your system.
- Wrenches and Socket Set: Prepare a set of wrenches and sockets to remove and install fittings.
In addition to the primary tools, consider the following:
- Torque Wrench: Vital for achieving the proper torque settings on brake fittings.
- Brake Line Cutter: Necessary for trimming stainless steel lines to the desired length.
- Bending Tool: Helps shape the brake lines without kinking.
- Flare Tool: Used for creating secure connections at the end of the brake lines.
- Brake Line Fittings: Ensure you have the correct types and sizes to connect the lines to your brake system.
- Safety Glasses: Protect your eyes from brake fluid and flying debris.
- Rags or Paper Towels: For cleaning up brake fluid spills during installation.
Having the right tools and materials on hand will streamline the installation of your stainless steel brake lines and contribute to a successful outcome. Proper preparation is key to ensuring safety and performance in your braking system.
Step-by-Step Process for Removing Old Brake Lines
Before beginning the removal process, ensure that the vehicle is parked on a level surface and that the ignition is off. Engage the parking brake to secure the vehicle, preventing any movement during the procedure.
First, locate the old brake lines. These lines typically run from the master cylinder to the brake calipers or wheel cylinders. Inspect the lines for any signs of corrosion or damage, which may indicate the need for an upgrade to stainless steel lines.
Using the appropriate tools, such as a line wrench, carefully loosen the fittings at both ends of the brake line. Start with the connection at the brake caliper or wheel cylinder, followed by the fitting at the master cylinder. Apply penetrating oil to stubborn fittings if needed, allowing it to sit for a few minutes for better results.
Once the fittings are loose, remove them completely. Be prepared for some brake fluid leakage. It’s advisable to have a catch pan or rags handy to absorb any fluid that spills during the process.
Next, follow the path of the brake line and unclip any retaining clips or brackets that hold it in place along the chassis. Take note of how the old line is routed, as this will help when installing the new stainless steel lines.
After all attachments have been removed, gently pull the old brake line out of its mounting position. Avoid using excessive force to ensure that other components are not damaged during removal.
With the old line removed, inspect the surrounding area for any debris or damage that might need attention before proceeding with the installation of the new stainless steel brake lines. This step will ensure that the upgrade provides optimal performance and durability.
Installing Stainless Steel Brake Lines: A Detailed Walkthrough

Installing stainless steel brake lines can significantly enhance the performance and durability of your braking system. These lines offer improved resistance to corrosion and pressure, ensuring safer driving experiences. This walkthrough covers the essential steps to successfully install stainless steel brake lines on your vehicle.
Before starting, gather necessary tools and materials, including a brake line wrench, a flare fitting tool, and the new stainless steel brake lines. It’s also advisable to have a brake fluid container and rags for any spills.
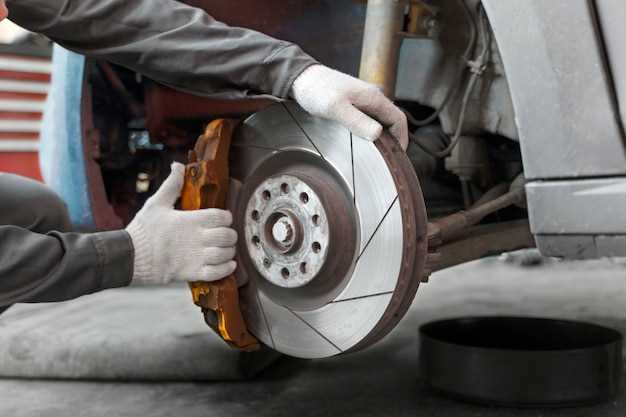
Begin by safely lifting the vehicle using jack stands and removing the wheels to access the brake components. Ensure that the brake system is completely depressurized. If necessary, remove the brake calipers and hang them to prevent stress on the brake lines.
Next, locate the factory brake lines. Carefully disconnect them using the brake line wrench, taking care not to damage any surrounding components. If the lines are corroded, you may need to use penetrating oil to assist in removal. Make sure to collect any residual brake fluid in a container to avoid spillage.
Once the old lines are removed, compare them with the new stainless steel brake lines to confirm proper sizing. Now, begin installing the new lines. Start at one end, threading the stainless steel brake line into the corresponding fitting. Make sure to tighten it securely, but avoid over-tightening to prevent damage.
Continue routing the new lines through the appropriate clips and brackets, ensuring that they do not come into contact with any hot or moving parts. This routing is crucial for maintaining the integrity of the brake lines.
After all lines are installed, reconnect the brake calipers if removed and ensure that all connections are tight and secure. Once everything is in place, it’s time to refill the brake fluid reservoir with new fluid, as the system may have lost some during the installation process.
Bleed the brake system by opening the bleeder screws on the calipers and allowing air to escape until you notice a steady stream of brake fluid. Close the screws and move to the next caliper, repeating the process until all air is purged from the system.
Finally, double-check all connections for leaks and ensure everything is properly secured. Reinstall the wheels, lower the vehicle, and conduct a thorough test drive to confirm that the brakes perform correctly and responsively.
By following this detailed walkthrough, you can successfully install stainless steel brake lines, enhancing your vehicle’s braking performance while ensuring safety for the road ahead.
Common Mistakes to Avoid During Installation
Installing stainless steel brake lines is a popular upgrade for enhancing braking performance. However, several common mistakes can lead to complications and potential hazards. Awareness of these pitfalls is essential for a successful installation.
1. Inadequate Preparation: Failing to gather all necessary tools and materials before starting the installation process can lead to frustration. Ensure you have the correct size wrenches, a brake line flair tool, and new washers to avoid interruptions.
2. Neglecting to Clean Brake Components: Dirt and debris on brake components can contaminate the system and compromise performance. Clean the fittings and around the brake calipers before installation to ensure a proper seal.
3. Over-Torquing Fittings: Applying excessive torque when tightening fittings can damage the brake line or the fitting itself. Always refer to the manufacturer’s specifications for recommended torque settings.
4. Misrouting Brake Lines: Incorrectly routing brake lines can lead to kinks or contact with moving parts, leading to potential failure. Take the time to route lines carefully, ensuring they are secure and away from heat sources.
5. Failing to Bleed the Brake System: After installation, neglecting to bleed the brake system can result in air bubbles trapped in the lines, degrading brake performance. Make sure to thoroughly bleed the brake lines according to proper procedures.
6. Not Testing Before Driving: Skipping the test drive or making assumptions about the brake system’s integrity can be dangerous. Always test the brakes at low speeds to ensure proper function before hitting the road.
Avoiding these common mistakes will help ensure a safe and effective upgrade to your braking system. Proper installation and attention to detail are critical for maximizing the benefits of stainless steel brake lines.
Testing and Maintaining Your New Brake Lines After Installation
Once you have successfully installed your new stainless steel brake lines, it’s crucial to ensure that they operate flawlessly. Testing your brake system after an upgrade is essential for safety and performance. Begin by carefully checking for any visible signs of leaks around the connections and fittings. Using a flashlight can help identify small leaks that may not be immediately apparent.
Next, perform a brake fluid test. Pump the brake pedal several times to build up pressure, then hold the pedal down. If it feels firm and there are no leaks, you’re on the right track. If the pedal sinks or feels spongy, it may indicate air in the brake lines or inadequate fluid levels, requiring further inspection.
After confirming no leaks and appropriate pedal feel, take your vehicle for a test drive in a safe area. Pay attention to the braking response. The brakes should engage smoothly and efficiently without any unusual noises or vibrations. If any issues arise during this test, reevaluate the installation and connections to ensure everything is secure.
Maintaining your stainless steel brake lines involves regular inspections and proper care. Check for signs of wear, corrosion, or damage every few months, especially if you drive in harsh conditions. Ensure that brake fluid levels are adequate, and replace the fluid as per the manufacturer’s recommendations to prevent moisture buildup, which can lead to brake fade.
In addition, it is beneficial to flush and replace the brake fluid every two years. This practice not only extends the life of your brake lines but also ensures optimal performance. Keeping a maintenance schedule will help you catch any potential issues early, ensuring that your brake upgrade continues to perform at its best.


