When it comes to maintaining the aesthetic appeal of your beloved VW Corrado, the condition of its body and panels plays a crucial role. One of the most common areas that can suffer from damage is the fender, where dents can occur due to minor accidents, parking mishaps, or even natural wear and tear. Learning how to effectively repair these dents not only enhances the visual appeal of your vehicle but can also preserve its value over time.
Effective repair of a dented fender requires a focused approach that begins with assessing the damage. Understanding the depth and size of the dent can help you determine whether a DIY solution is feasible or if professional help is needed. This guide aims to provide step-by-step instructions and tips for successfully addressing fender dents, ensuring your Corrado remains in top-notch condition, both functionally and aesthetically.
In this comprehensive guide, we will cover the necessary tools, techniques, and best practices for repairing a dented fender. Whether you opt for traditional methods or more modern techniques, such as paintless dent repair, by following this advice, you can restore your vehicle’s body to its original glory without breaking the bank.
Assessing the Damage: Identifying Dents on Your Fender

Identifying dents on your Corrado’s fender is the first step in the repair process. A thorough assessment helps you understand the extent of the damage and plan the necessary body repairs. Begin by visually inspecting the fender under adequate lighting to reveal any imperfections. Surface reflections can highlight even minor dents.
Next, use your hand to run along the surface of the fender. This tactile inspection helps detect subtle irregularities that may not be immediately visible. Pay attention to any areas that feel uneven or have sharp edges, as these could indicate deeper issues beneath the paint.
| Dent Type | Description | Repair Approach |
|---|---|---|
| Surface Dent | Shallow indentations without paint damage. | Use a hair dryer followed by dry ice or a plunger for removal. |
| Creased Dent | Dents with a noticeable crease or wrinkle. | Professional repair may be needed; consider body filler. |
| Paintless Dent | Dents without paint chips, usually from minor impacts. | Can often be repaired using specialized tools. |
| Paint Damage | Dents that have chipped or cracked the paint. | Requires sanding and repainting for a seamless finish. |
Document the location and type of each dent you find, as this will be crucial for planning your repair approach. Take additional notes on any surrounding areas that may need attention, such as rust or corrosion. By assessing the damage carefully, you set the foundation for a successful fender repair that restores your Corrado’s body to its former glory.
Tools Required for Fender Repair on a Corrado

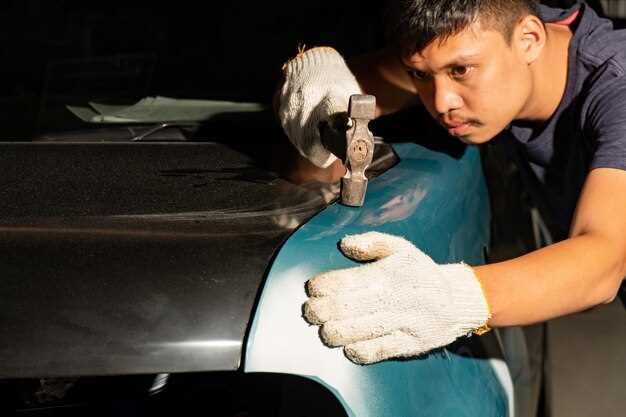
To effectively repair the fender on your Corrado, you need a specific set of tools that will help you work with the body panels efficiently. The primary tools include a panel beater or hammer, which is essential for reshaping the dented areas of the fender. A dolly is also indispensable, as it provides support and helps in refining the metal as you manipulate it back into shape.
In addition to these, you will require a set of pliers for gripping and bending metal strips, as well as a screwdriver set for removing any fixtures or fittings attached to the fender. A grinder or a metal file is crucial for smoothing out any rough edges after the repair process is complete.
To ensure precision during the repair, having a measuring tape or caliper can aid in maintaining the correct dimensions of the fender. For sanding and polishing, a sanding block and various grades of sandpaper will be necessary to achieve a smooth surface before paint application.
Finally, safety equipment such as gloves and goggles should be on hand to protect yourself from metal shards and dust generated during the repair work. Having the right tools will make the process of fender repair on your Corrado more efficient and yield a professional finish.
Step-by-Step Guide to Removing the Fender
Removing the fender from your vehicle is essential for effective repairs and maintenance. Follow these steps to ensure that you safely and efficiently remove the fender from your Corrado.
- Gather Necessary Tools and Materials
- Socket set
- Wrenches
- Screwdrivers
- Trim removal tool
- Protective gloves
- Safety goggles
- Prepare the Area
Park your Corrado on a flat surface and engage the parking brake. Remove any obstacles around the vehicle to ensure a safe working environment.
- Disconnect the Battery
To prevent any electrical issues, disconnect the negative terminal of the battery using a wrench. This is crucial for your safety.
- Remove Wheel and Tire
If necessary, remove the wheel and tire that is adjacent to the fender for better access. Use a socket to remove the lug nuts, and then take off the wheel.
- Locate and Remove Bolts
Identify the bolts holding the fender in place. Generally, these bolts are located in the engine bay, along the edges of the fender, and sometimes near the door.
- Use the right socket or wrench size to unscrew each bolt.
- Keep track of the bolts and place them in a container for reassembly.
- Detach Any Wiring or Clips
Check for any electrical connections or clips that may be attached to the fender. Carefully disconnect any wiring harnesses and remove clips using a trim removal tool.
- Gently Pull the Fender Away
Once all bolts, clips, and wiring are removed, gently pull the fender away from the body of the vehicle. Be cautious not to damage the surrounding panels or paint.
- Inspect for Damage
After removing the fender, assess both the fender and the area of the body frame for any damages that need repair. Note any dents or scratches that require attention.
With these steps completed, you can now proceed with any repair work needed for the fender or the body of your Corrado. Properly reinstallation follows the reverse order of removal.
Methods for Popping Out Dents: DIY Techniques
Repairing dents in your Corrado’s fender can enhance its appearance and protect the underlying metal from rust. There are several effective DIY techniques to pop out those pesky dents without the need for professional help. Here are some methods to consider:
One popular technique is the use of a hairdryer combined with aluminum foil. Start by heating the dented panel with a hairdryer on high to expand the metal. Once the area is warm, cover it with a piece of aluminum foil to protect the paint. Next, apply dry ice to the dent for a quick cooling effect. The sudden temperature change often causes the metal to contract, popping the dent out. Always wear gloves when handling dry ice for safety.
An alternative method involves using a plunger. This tool works best on shallow dents. Moisten the edge of the plunger and place it over the dent, then pull firmly. The suction created can help pull the dent back into its original shape. If the dent is stubborn, you may need to repeat the process a few times.
Another effective DIY technique is the use of a vacuum cleaner and a heat gun. Heat the dent before applying a small piece of tape over the center. Use the vacuum’s nozzle against the tape to create suction. This method can help extract the dent while minimizing the risk of damage to the panel.
For more precise work, a dent repair kit can be purchased, which typically includes a glue gun, pulling tabs, and other tools designed for fender repair. Follow the kit’s instructions carefully to achieve the best results. Ensure the area is clean before applying any glue to guarantee a strong bond.
These DIY techniques provide a cost-effective way to address dents in your Corrado’s fender. With patience and the right approach, you can restore the panel and maintain your vehicle’s aesthetic appeal.
Finishing Touches: Painting and Sealing the Repaired Fender
After successfully repairing the dent on your Corrado’s fender, the next critical step is to ensure the panel is aesthetically pleasing and protected. Begin by thoroughly cleaning the repaired area to remove any dust, grease, or debris that could hinder paint adhesion.
Once the surface is clean, apply a primer to the repaired fender. Priming is essential as it helps the paint bond effectively to the body of the car and acts as a barrier to rust and corrosion. Ensure you choose a primer compatible with the paint you plan to use. After applying the primer, allow it to dry completely according to the manufacturer’s instructions.
Next, select a high-quality automotive paint that matches the original color of your Corrado. Using a spray gun or spray can, apply several thin coats of paint over the primed area. It’s better to build up the color gradually rather than applying a thick layer, which could lead to runs and an uneven finish. Allow each coat to dry fully before applying the next to achieve a smooth and professional appearance.
Once the final coat of paint has dried, it is time to finish the fender with a clear coat. This step adds depth to the color and provides a protective layer against UV rays, scratches, and environmental damage. Apply the clear coat in the same manner as the paint, ensuring even coverage across the panel.
After the clear coat is applied, let it cure for the recommended time. Once fully cured, you can polish the surface to enhance shine and blend the repaired fender with the rest of the body. A careful buffing job will help you achieve a seamless transition between the new and old finishes.
Finally, inspect the repaired area to ensure it meets your standards. Touch up any spots if necessary, and your fender repair will not only be functional but visually appealing as well.
Preventive Measures: Avoiding Future Fender Damage
Maintaining the integrity of your vehicle’s body is crucial for both appearance and value. Here are several effective steps to help you avoid damage to the fenders and panels of your Corrado:
-
Regular Inspections:
Frequently check your fenders and surrounding areas for any signs of wear or minor dents. Addressing issues early can prevent more severe damage.
-
Avoid Tight Spaces:
Be cautious when parking in tight spots. Hitting walls or other vehicles can lead to fender dents. Always choose a spacious area when possible.
-
Use Protective Covers:
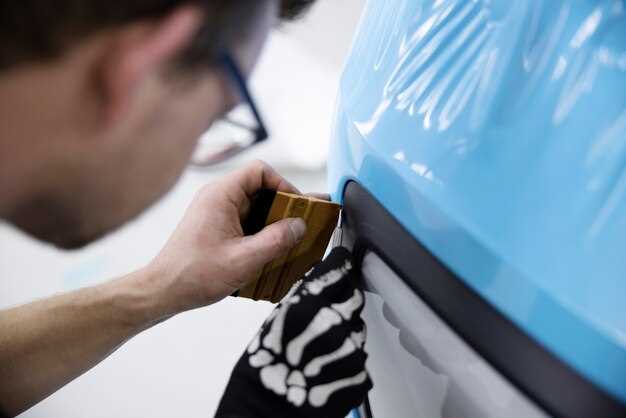
Invest in high-quality car covers or protective films that shield your vehicle’s panels from scratches and dents caused by debris or environmental factors.
-
Mind the Load:
When loading or unloading items, especially heavy objects, be mindful of the proximity to the fenders. Use padding or move items carefully to avoid impacts.
-
Maintain a Safe Following Distance:
Keeping adequate space from other vehicles reduces the risk of accidents that may lead to fender damage.
-
Road Condition Awareness:
Stay vigilant about road conditions. Rough terrain or potholes can cause significant damage to the vehicle’s fenders. Choose smoother routes whenever possible.
-
Install Parking Sensors:
Consider installing parking sensors or a rear-view camera. These tools can help you gauge distance from obstacles, reducing the likelihood of fender collisions.
By taking these preventive measures, you can significantly reduce the risk of future damage to your vehicle’s body and ensure that your Corrado maintains its aesthetic appeal and value over time.


