

The instrument cluster of a Volkswagen Corrado serves as the central dashboard for monitoring vital information about your vehicle’s performance and status. When issues arise within the cluster, it can lead to inaccuracies in readings and potential confusion for the driver. This guide aims to provide a comprehensive overview of common electronic problems associated with the Corrado’s instrument cluster and effective troubleshooting techniques.
At the heart of the electrical system, the cluster displays critical data such as speed, fuel level, and engine temperature. Malfunctions in the dashboard electronics can result in erratic behavior, including flickering lights, non-functional gauges, or complete display failure. Understanding the underlying issues can save time and reduce costs associated with professional repairs.
This article will explore various diagnostic methods and repair strategies that enthusiasts and owners can utilize to address these common instrument cluster issues. Whether you’re an experienced technician or a first-time DIYer, our guide will equip you with the knowledge necessary to tackle these problems confidently and restore functionality to your Corrado’s dashboard.
Identifying Common Dashboard Electronics Failures
The dashboard electronics in the Corrado instrument cluster can encounter various issues over time. Recognizing these failures early can prevent more significant problems and costly repairs. Below are some common signs and symptoms of dashboard electronic failures, along with their possible causes and solutions.
| Symptom | Possible Cause | Recommended Action |
|---|---|---|
| None of the gauges function | Faulty main power supply or blown fuse | Check fuses and wiring connections, replace as necessary |
| Intermittent lighting on dashboard | Loose connections or worn-out bulbs | Inspect bulb sockets and wiring; replace bulbs or repair connections |
| Inaccurate speedometer readings | Malfunctioning speed sensor or cluster issues | Test the speed sensor functionality, consider cluster recalibration |
| Warning lights staying illuminated | Faulty sensors or wiring problems | Run a diagnostic scan to isolate the fault; repair as needed |
| No LCD display | Failed display driver or connection issues | Check for loose connections and replace the display driver if necessary |
| Erratic gauge movement | Grounding issues or voltage fluctuations | Inspect grounding points and voltage stability in the vehicle |
Regular maintenance and timely diagnostics of the dashboard electronics in the Corrado can save time and expense in the long run. If you notice any of these symptoms, it’s advisable to investigate the underlying causes promptly to ensure the reliability of your instrument cluster.
Troubleshooting Gauge Cluster Malfunctions Step-by-Step
When faced with issues related to the gauge cluster of your Corrado, understanding the root cause is essential for effective repairs. Follow the steps below to systematically troubleshoot any malfunctions in the electronics of the cluster.
-
Initial Inspection
- Check for any visible damage to the cluster.
- Inspect wiring harness connections for looseness or corrosion.
- Look for blown fuses in the fuse box related to the instrument cluster.
-
Power Supply Verification
- Use a multimeter to check for voltage at the cluster connector.
- Ensure that the supply voltage matches the specifications outlined in the service manual.
-
Gauge Functionality Test
- Turn on the ignition and observe the behavior of each gauge.
- Note any gauges that do not move at all or exhibit erratic behavior.
-
Ground Connection Check
- Locate the ground wires attached to the cluster.
- Test the integrity of ground connections using the multimeter.
- Repair or replace any faulty ground connections identified.
-
Signal Input Testing
- Identify the signal inputs for each gauge (e.g., fuel level, temperature).
- Use a diagnostic tool to check if the signals are being transmitted correctly.
-
Component Examination
- Inspect internal components like resistors and capacitors for wear or damage.
- If necessary, replace defective parts to restore proper function.
-
Reassemble and Test
- After addressing issues, reassemble the cluster carefully.
- Reconnect all wiring and secure the cluster back in place.
- Turn on the ignition and verify that all gauges are functioning correctly.
Following these steps should help you effectively diagnose and repair any malfunctions with the gauge cluster electronics in your Corrado. If problems persist, consulting a professional may be necessary for further inspection and repair.
Repairing Faulty Speedometer and RPM Gauge Connections
Dashboard issues can often stem from faulty connections in the speedometer and RPM gauge. These gauges rely heavily on electronic signals to function correctly. To resolve any issues with these instruments, follow these detailed steps:
- Gather Necessary Tools:
- Screwdriver set
- Multimeter
- Wire crimpers
- Electrical tape
- Anti-oxidant electrical grease
- Remove the Dashboard:
To access the speedometer and RPM gauge connections, you need to carefully remove the dashboard. Follow these steps:
- Disconnect the battery to prevent any electrical shorts.
- Remove any panels surrounding the dashboard.
- Unscrew the dashboard assembly and gently pull it away.
- Inspect Gauge Connections:
Once the dashboard is removed, locate the back of the speedometer and RPM gauges. Check for the following:
- Loose or corroded connectors
- Frayed or damaged wiring
- Signs of moisture or rust in the connections
- Test Electrical Connections:
Use a multimeter to verify that electrical signals are being transmitted correctly:
- Set the multimeter to the continuity testing mode.
- Check each wire connected to the gauges for continuity.
- Replace any wires that show no continuity.
- Repair or Replace Damaged Connections:
If any connections are found to be damaged:
- Use wire crimpers to attach new connectors.
- Apply anti-oxidant grease to prevent future corrosion.
- Ensure that all connections are tight and secure.
- Reassemble the Dashboard:
After repairs are completed, reassemble the dashboard:
- Reattach the dashboard assembly carefully.
- Screw in all panels and ensure everything is secure.
- Reconnect the battery.
- Test the Gauges:
Start the vehicle and check the functionality of the speedometer and RPM gauge. Ensure that they respond accurately to changes in speed and engine RPM.
By following these steps, you can effectively repair faulty connections in your Corrado’s speedometer and RPM gauge, ensuring that your dashboard electronics function properly.
Replacing Damaged Dashboard Light Bulbs and LEDs
When dealing with issues in the Corrado instrument cluster, one common problem that many owners face is the failure of dashboard light bulbs and LEDs. These components are essential for illuminating the gauge cluster, ensuring visibility of important information while driving.
Before starting the replacement process, gather the necessary tools, including a screwdriver, a pair of needle-nose pliers, and replacement bulbs or LEDs compatible with your vehicle model. Ensure that the vehicle is turned off and the keys are removed from the ignition to avoid any electrical issues.
Begin by removing the dashboard panel. Carefully unscrew and detach any clips holding it in place, taking care to avoid damaging the surrounding areas. Once the panel is removed, the gauge cluster will be exposed, allowing access to the light fixtures.
Identify the burned-out bulbs or malfunctioning LEDs within the cluster. In some cases, bulbs may simply need to be replaced, while LED units might require additional steps due to their integrated nature. Use needle-nose pliers to gently twist and pull out the damaged bulb from its socket. For LEDs, check the connectors for any signs of damage and replace the entire LED module if necessary.
Insert the new bulbs or LEDs into the suitable sockets, ensuring that they are securely fitted. Pay attention to polarity when installing LEDs, as incorrect orientation may result in non-functionality. Once all replacements are made, it is advisable to test the lights before reassembling the dashboard. Turn on the ignition and check if the new bulbs and LEDs illuminate properly.
After confirming that everything is functioning correctly, carefully reattach the dashboard panel. Secure all screws and clips to ensure a tight fit. Finally, a thorough inspection of the gauge cluster will confirm that all lighting issues have been successfully resolved, enhancing visibility and safety while driving the Corrado.
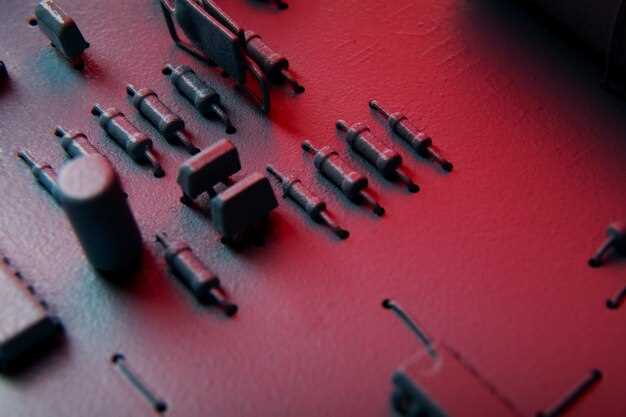
Testing and Replacing Instrument Cluster Circuit Boards
Testing the circuit boards of an instrument cluster is essential for diagnosing issues with the gauges on the dashboard. Start by removing the cluster from the dashboard, taking care not to damage the connectors or any surrounding components. Once removed, inspect the circuit board for visible signs of damage, such as burnt areas or broken traces.
To test the functionality of the circuit board, use a multimeter to check for continuity in the traces leading to each gauge. This will help identify any broken connections that may be causing incorrect readings or complete failure of the gauges. If continuity tests reveal issues, it may be necessary to repair the traces using conductive solder or repair kits specifically designed for circuit boards.
If the circuit board is extensively damaged or repairs are not feasible, replacing it is the best option. Obtain a compatible replacement circuit board designed for your specific model of the Corrado. Ensure that the new board is free from defects and properly matches the gauge configuration of the original cluster.
Install the new circuit board carefully, making sure that all connections are secure and that no solder bridges are present. After reassembly, reconnect the cluster and test all gauges in the dashboard to confirm that they are functioning correctly. Proper testing and replacement of the circuit board can restore the full functionality of the instrument cluster and enhance your driving experience.
Recalibrating Instruments After Repair or Replacement
After repairing or replacing any components of the Corrado instrument cluster, recalibrating the gauges is crucial to ensure accurate readings. Without proper calibration, the dashboard may display incorrect information, leading to potential safety hazards and performance issues.
To begin the recalibration process, first, ensure that all connections are secure and that the cluster is correctly installed in the vehicle. Any loose wires or poorly connected components can lead to misleading readings. Once verified, turn the ignition on without starting the engine, allowing the dashboard to power up.
Some models may require a specific sequence to recalibrate the gauges. Consult the vehicle’s service manual for detailed instructions on the recalibration procedure. In general, this may involve pressing a combination of buttons on the dashboard or using a diagnostic tool to reset the cluster settings.
If the gauges still show incorrect readings after following the initial steps, consider performing a manual sweep of the dashboard gauges. This process can help identify any malfunctioning gauges and provide a baseline for further adjustments. To do this, activate each gauge sequentially and observe if it returns to its resting point correctly.
Lastly, once recalibration is complete, conduct a test drive to verify that all instruments on the dashboard function accurately under real conditions. Pay attention to the speedometer, fuel gauge, and temperature gauge, and ensure that they reflect expected values. If discrepancies persist, further investigation may be required to identify underlying issues with the cluster or wiring.


